My partner and I decided to try and grow our own quinoa in our backyard garden. Quinoa seed is really expensive and we didn’t like the fact that the high cost/demand of quinoa was pricing out families in South America who rely on it. We didn’t know if it would grow in our climate but we thought it would be fun to find out. Our project was a great success and we wanted to share what we learned.

GROW THE QUINOA
Our little experiment consisted of about 10-15 plants I am guessing. We live in Portland, Oregon and contrary to our image as “the rainy city,” it really doesn’t rain much here in the summer. Turns out quinoa doesn’t need much rain/water. I witnessed this myself, because when I do water (infrequently) with a sprinkler the outer edge of the garden where our quinoa was doesn’t get very much moisture.
The plants themselves are beautiful and one nice surprise was learning the leaves are edible! They have a mild and nutty flavor that to me is a cross between spinach and the cooked quinoa. They are great in salad or just by themselves out in the garden. You will want to eat the young green leaves for the best flavor, but don’t pick too many because the plant likes them too.
We planted from seed. I believe it was a quinoa variety pack. Some of it was golden and some turned very red. We planted in the spring and let it grow until early October. You want to wait as long as you can to harvest but not so long that the seed falls off. I would have let it stay in the garden longer, (before first frost) but my partner was worried about the rain coming back and it was probably wise that we harvested when we did because it did start raining… a lot. She’s always right.

HARVEST THE QUINOA
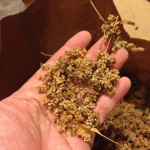
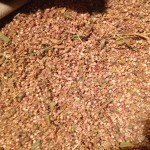
When we first harvested the plants, we tried to separate the grain from the chafe using the traditional method which is using a tarp or blanket to toss it into the air and have the shells, leaves and stems fly off in the breeze. We worked for about an hour and had about a 1/3 cup of grain when we were done. We realized we needed a better way for it to be a viable food source. The seeds were black too – not the white that I was familiar with. We practiced with some of the smaller immature (less seed) plants, which might have explained the seeds being black but it might have also had something to do with the seeds not being dry enough. I tried eating the seeds but they were not good. I learned later that you have to wash the saponin off because it is bitter tasting- more on that in a moment. We tied the remaining large stalks up and hung them upside-down in the basement to dry. We let them hang there for about 3 1/2 months.
THRESHING THE QUINOA
Before putting the grain into the winnower you will want to separate as many big stems and leaves as you can. After I pulled the seed pods off of the plants I put them in a pillowcase and tied it off securely. I then put that pillowcase in another pillowcase and tied that off and then, (Are you ready for this?) I put it in the clothes dryer with a couple of sneakers. I turned the heat off and and ran it for about 3o minutes. This helped separate the seeds from the hull and also broke the leaves and stems down to a manageable size for the winnower. We have a clunky old dryer though and if this part is too scary you could just shake and agitate it by hand but you really want to get those seeds loose and the little branches and leaves crumbled good. I took the easy hillbilly engineer route. It worked great!
PROCESS THE QUINOA
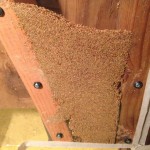
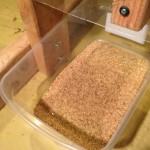
I knew we had to find a better way to clean the grain or it just wouldn’t be worth it for us. I started researching ways to clean it. I found what I hoped would be a solution on the “Real Seed Catalog” website where I found this post about an open source winnowing machine. I didn’t know if it would work for our needs but it seemed like the best option so I gave it a whirl. I had some scrap wood and a vacuum and some plexiglass I harvested from an old poster picture frame so I loosely followed the plans and built my own. Our household vacuum was a little weak (not the shop vac used in the plans) so I had to double up the pressure with two of them but it worked really well. The plans call for holes to be drilled for venting with an adjustable flap of sorts to control the flow but I improvised. I played around with the suction power by adjusting the gasket around one of the vacuums. I used some foam insulation material around where the vacuum went into the device and just adjusted the amount of external air that was allowed in. I found a nice balance where the grain fell down into the bin and the lighter (chafe) went into the proper debris area. Too much suction and the grain goes over to the debris area. It wasn’t perfect but worked good. I had to run the seed about 6 times but after that it was really clean and it was way easier than doing it with the wind and a tarp!
Here is a short video of the winnowing machine in operation. This thing saved us a bunch of time, and I owe a debt of gratitude to the good folks at The Real Seed Catalog UK for the inspiration. It was fun to build and even more fun to watch. The grain and the chafe separated nicely.

SAPONIN
Quinoa has a natural occurring pesticide called “saponin” that protects the plant from insects and birds. This stuff needs to come off before you eat it or it tastes bitter and might give you a stomach ache. I heard that the stuff was soapy from my research but I had no idea it was going to be this soapy! I learned that people make detergent from it which makes sense when you see what comes off of it. I put the grain in a bowl and used the dish sprayer, and the suds were amazing. The suds seem to help separate any remaining debris and you can push them off the top and remove the stuff that floats like the few remaining twig bits and some of the seeds that didn’t get completely de-shelled. The heaver seeds will stay on the bottom. I rinsed and rinsed and rinsed some more, then let them soak for a couple of hours and rinsed again until the suds stopped. I used a food strainer for the final rinse. I rinsed and dried the grain in small batches because I didn’t have a big enough bowl for all of it. Next year I will explore ways to do this part on a larger scale, but this method is fine for doing a years supply for a small family.

The next step is to do the final dry. I just spread the grain out on cookie sheets and let it air dry. One batch I preheated the oven to 200 then turned it off and put the trays in with the door slightly ajar. This sped up the process. We got about 4 trays full from our 10-15 plants. I am guessing about four boxes worth if you were to buy it packaged from the store. I tried cooking some as soon as it was dry and it was delicious!
The experiment was a huge success and we will be growing much more quinoa next year. We would like to grow about 100 plants and maybe have some to share with our friends. We might even try some amaranth too.
I hope this information will be helpful to people that want grow their own quinoa at home. Quinoa is a great vegan source of protein and it is really yummy. The health food stores charge an arm and a leg for quinoa so knowing we can grow it and process it ourselves is pretty exciting.
More info on quinoa:
Quinoa on Wikipedia
Nutritional Data on Quinoa
Quinoa – The World’s Healthiest Foods
27 Quinoa Recipes
Feel free to share!
http://bit.ly/1B1C6Ue


